Ktor for Mobile Developers: Is it Easy to Learn Server Side Coding? Part-1
To create your first simple Ktor application we are going to use Ktor Framework. Ktor can be used to create a variety of server and client-side applications.
I am assuming you already have installed IntelliJ IDEA Software in your system.
In this section, we’re going to cover the basics of what a Ktor Server Application is and how the pieces all fit together.
Ktor is an asynchronous framework for creating microservices, web applications, and more. It’s fun, free, and open source.
Why Ktor??
There is following main features of Ktor Framework :
1. Lightweight:
Use what you need. Ktor allows you to transparently configure only the functionality your project requires. No magic involved!
2. Extensible:
Extend what you need. With a configurable pipeline, you can create the extensions you need and place them anywhere you want.
3. Multiplatform:
Run it where you need it. Built from the ground up with Kotlin Multiplatform technology, you can deploy Ktor applications anywhere.
4. Asynchronous:
Scales as you need it. Using Kotlin coroutines, Ktor is truly asynchronous and highly scalable. Use the power of non-blocking development without the callback nightmare.
We can create the project by the following main methods:
1. Generate a Ktor project:
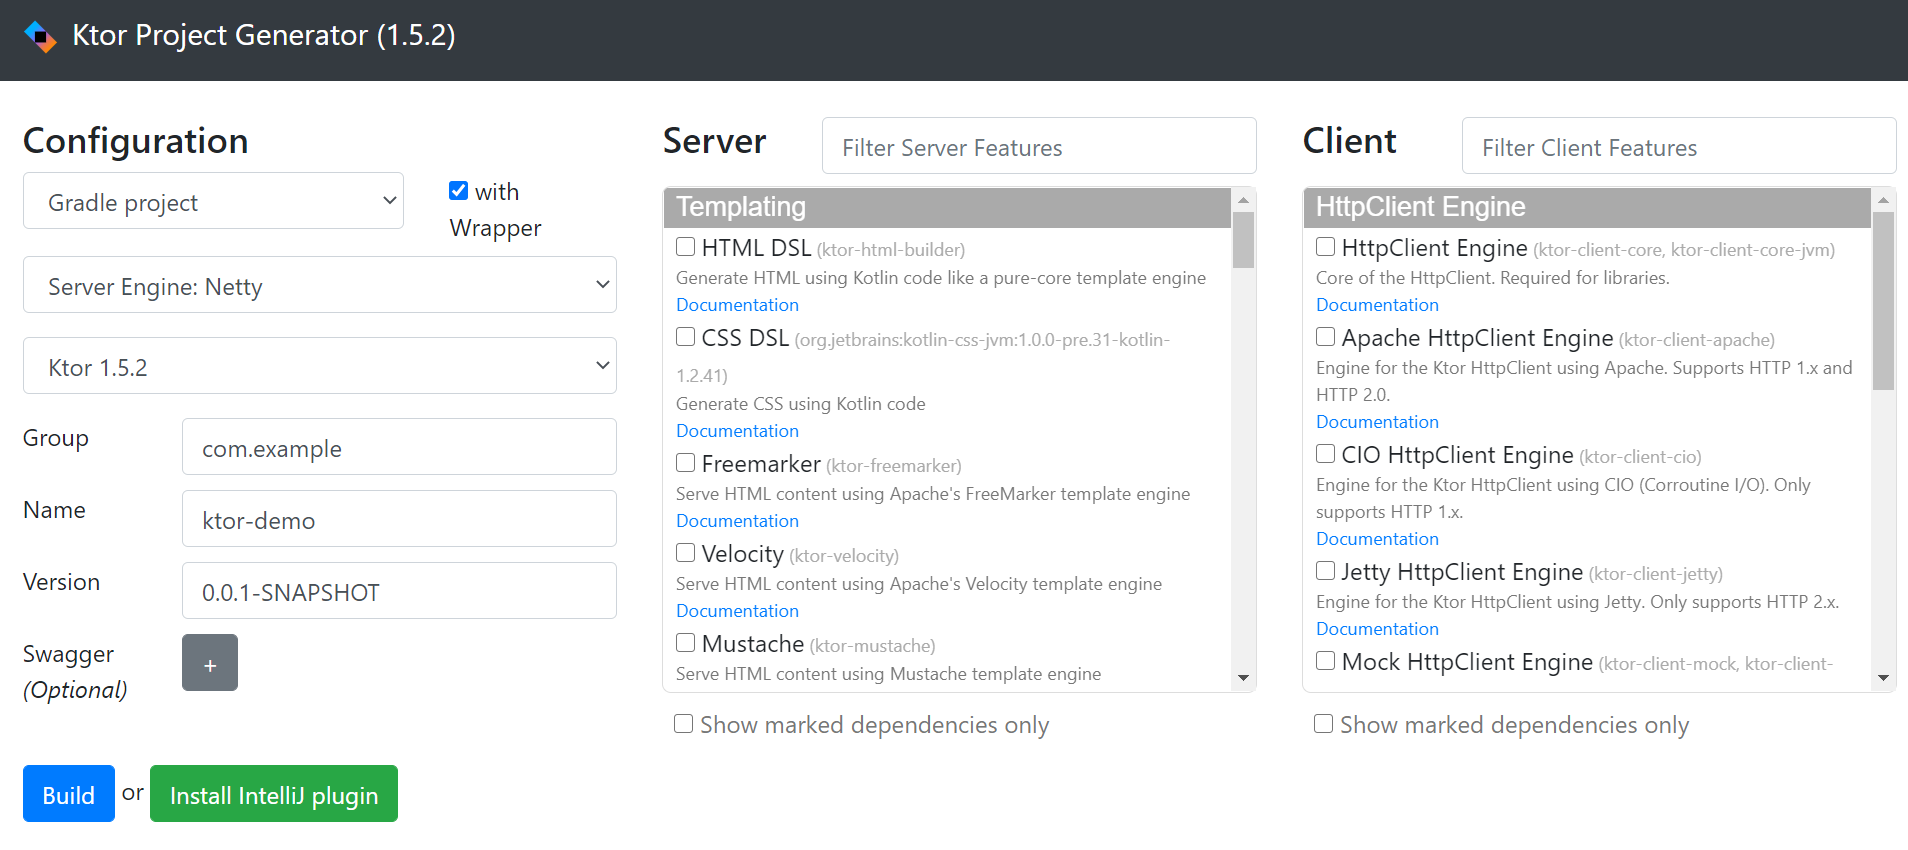
If you’re starting a new project with Ktor, you can get started quickly using start.ktor.io to generate and download your project template.

Click on Build Button and it will automatically download ready to use project in zip format.
2. Plugin for IntelliJ IDEA:
If you’re using IntelliJ IDEA, you can use the Ktor plugin not only to generate new projects but also to get significantly more functionality.
- In the Settings/Preferences dialog Ctrl+Alt+S, select Plugins.
- Use the Marketplace tab to browse and install plugins from the JetBrains Plugin Repository or from a custom plugin repository.
- Use the Installed tab to browse installed plugins, enable, disable, update, or remove them.
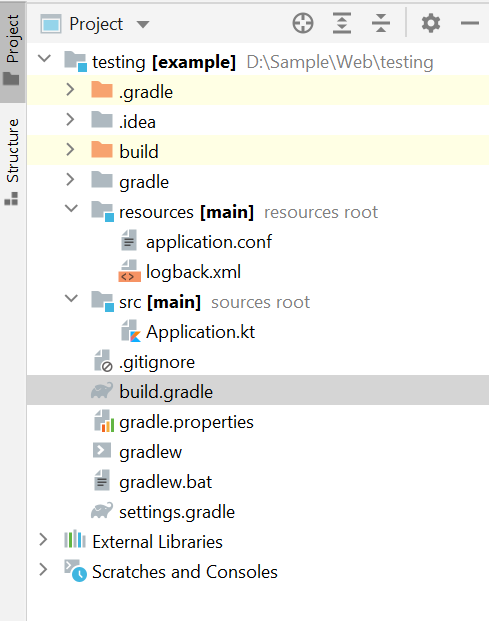
Open your project in IntelliJ IDEA and your project structure might be look like this.

For this hands-on, the dependencies block in our build.gradle file is probably the most interesting part:
dependencies {
implementation “io.ktor:ktor-server-core:$ktor_version”
implementation “io.ktor:ktor-server-netty:$ktor_version”
implementation “ch.qos.logback:logback-classic:$logback_version”
implementation “io.ktor:ktor-serialization:$ktor_version”
testImplementation “io.ktor:ktor-server-tests:$ktor_version”
}
Let’s briefly go through these dependencies one-by-one:
ktor-server-core adds Ktor’s core components to our project.
ktor-server-netty adds the Netty engine to our project, allowing us to use server functionality without having to rely on an external application container.
logback-classic provides an implementation of SLF4J, allowing us to see nicely formatted logs in our console.
ktor-serialization provides a convenient mechanism for converting Kotlin objects into a serialized form like JSON, and vice versa. We will use it to format our APIs output, and to consume user input that is structured in JSON. In order to use ktor-serialization, we also have to apply the org.jetbrains.kotlin.plugin.serialization plugin.
ktor-server-tests allows us to test parts of our Ktor application without having to use the whole HTTP stack in the process. We will use this to define unit tests for our project.
Run your application

The Logs will be shown in your Run Window at the bottom of your IDE.
2021–03–25 14:13:28.803 [main] INFO Application — Autoreload is disabled because the development mode is off.2021–03–25 14:13:29.156 [main] INFO Application — Responding at http://0.0.0.0:8080
Now your server is ready to use by clicking on http://0.0.0.0:8080 link it will open it in your default Browser .
On browser you will be see the message
This localhost page can’t be foundNow open your Application.kt file in your source folder under project directory.
In your Application.kt file write this code inside Application.module
fun Application.module(testing: Boolean = false) {
    routing {
        get("/") {
            call.respondText("HELLO WORLD!", contentType = ContentType.Text.Plain)
        }
        /*---------------------*/
        post { }
        put { }
        delete { }
    }
}
Let’s know little bit about each component that we used in above code.
routing:
Routing is the core Ktor feature for handling incoming requests in a server application. When the client makes a request to a specific URL (for example, /hello), the routing mechanism allows us to define how we want this request to be served. For more details, you can check it here Ktor Routing.
get:
It is request type (GET)made by the client. You can use other request type also like POST,PUT,DELETE.
call:
The ApplicationCall provides access to two main properties ApplicationRequest and ApplicationResponse. As their names indicate, they correspond to the incoming request and outgoing response.
Now restart your server again and open the link into the browser. You will see the message Hello Word on your browser.
Hurray!!! 😃 your first server application is created. 😆
To learn more about how to create GET and POST web api ? Please visit here Ktor for Mobile Developers: Is it Easy to Learn Server Side Coding? Part-2.


Comments
Post a Comment